Node.js 架构及使用示例
一、什么是 Node.js
Node.js® 是一个开源、跨平台的 JavaScript 运行时环境。
二、Node.js 的架构
Node.js 由 Libuv、Chrome V8、一些核心 API 构成,如图:
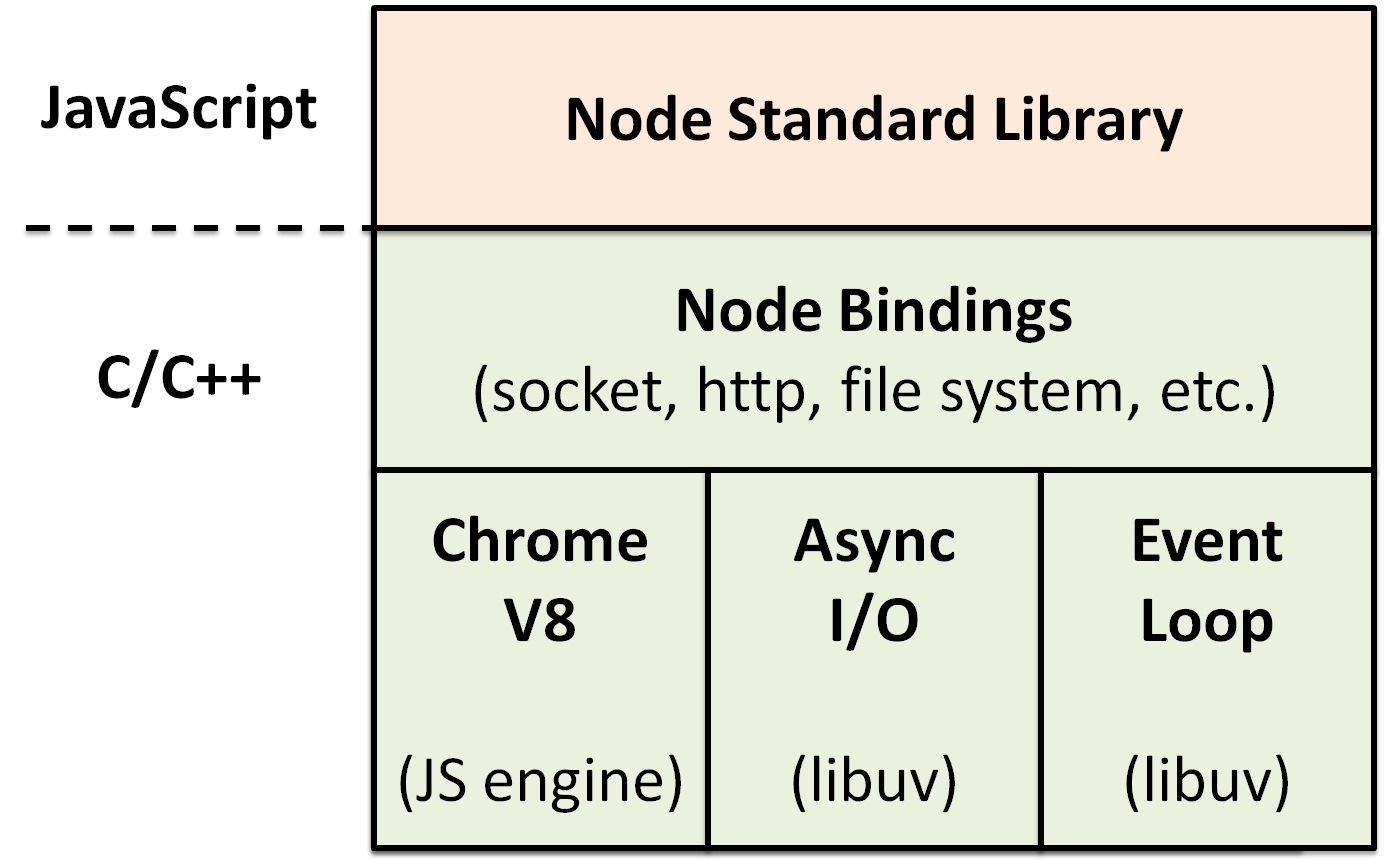
Node Standard Library:Node.js 标准库,对外提供的 JavaScript 接口,例如模块http、buffer、fs、stream等;Node bindings:JavaScript 与 C++ 连接的桥梁,对下层模块进行封装,向上层提供基础的 API 接口;- V8:Google 开源的高性能 JavaScript 引擎,使用 C++ 开发,负责把 JavaScript 代码转换成 C++,然后去跑这层 C++ 代码;
- Libuv:是使用 C 和 C++ 为 Node.js 开发的一个跨平台的支持事件驱动的 I/O 库,同时也是 I/O 操作的核心部分,例如读取文件和 OS 交互,Node 中的 Event Loop 就是由 libuv 来初始化的;
三、Node.js 特点/适用场景
Node.js 利用单线程,远离多线程死锁、状态同步等问题;而且利用异步 I/O,让单线程远离阻塞,以更好地使用 CPU。
由于 Node.js 使用了一个事件驱动、非阻塞式 I/O 的模型,使其轻量又高效,避免了等待输入输出(数据库、文件系统、Web服务器...)响应而造成的 CPU 时间损失。所以 Node.js 适合运用在高并发、I/O 密集、少量业务逻辑的场景。
对应到业务上,如果只是简单的数据库增删改查、流量不大的项目,Server 端可以完全使用 Node.js 实现;而流量较大,复杂度高的项目,可以用 Node.js 作为接入层,再由后端同学负责实现服务。如图:

四、Node.js 的示例
1、简单示例
新建文件 server.js:
const http = require('http');

const hostname = '127.0.0.1';
const port = 3000;

const server = http.createServer((req, res) => {
  res.statusCode = 200;
  res.setHeader('Content-Type', 'text/plain');
  res.end('Hello World\n');
});

server.listen(port, hostname, () => {
  console.log(`Server running at http://${hostname}:${port}/`);
});
运行以下命令:
node server.js
打开 http://127.0.0.1:3000/:

控制台可以看到:
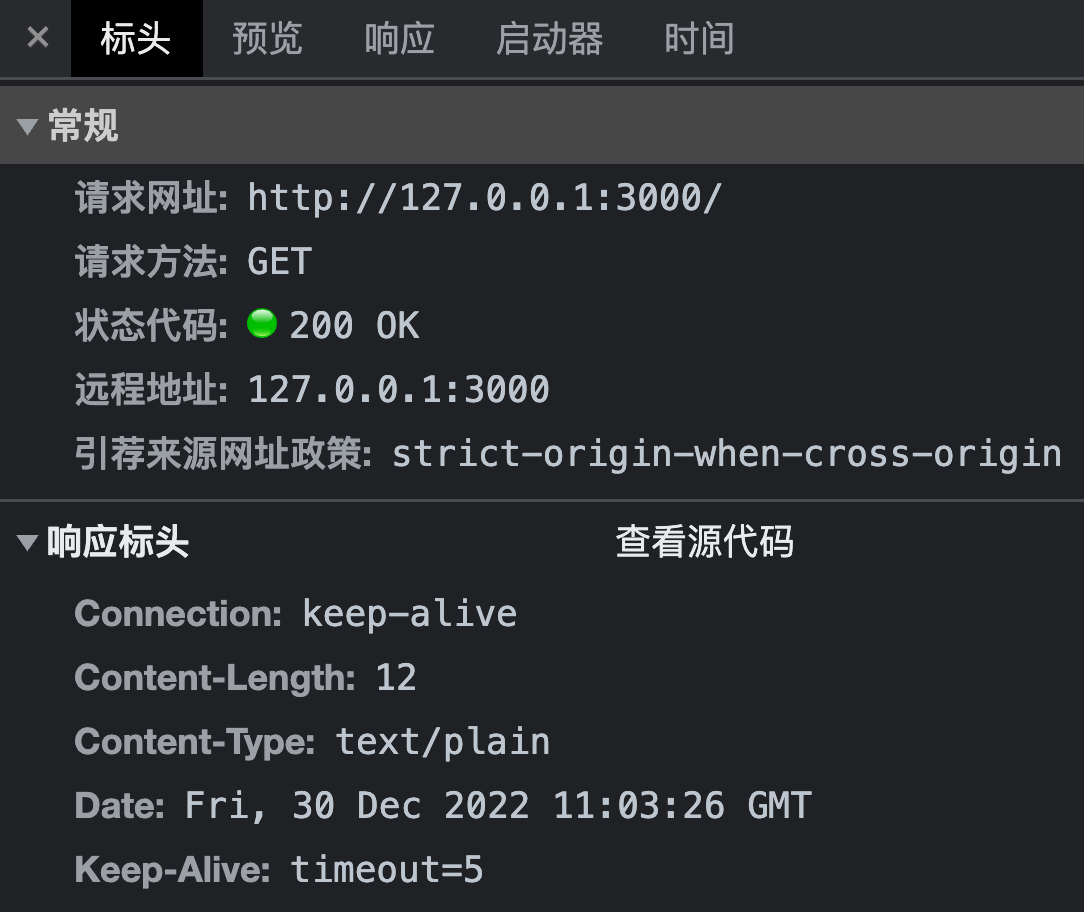
可通过 Postwoman 插件调试
2、发送 GET/POST 请求
const http = require('node:http');
const querystring = require('node:querystring')

const hostname = '127.0.0.1';
const port = 3000;

const server = http.createServer((req, res) => {
  const method = req.method
  const url = req.url
  const path = url.split('?')[0]
  const query = querystring.parse(url.split('?')[1])

  // 设置返回格式为 JSON
  res.setHeader('Content-type', 'application/json')

  // 返回的数据
  const resData = {
    method,
    url,
    path,
    query
  }

  // 返回
  if (method === 'GET') {
    res.end(
      JSON.stringify(resData)
    )
  }
  if (method === 'POST') {
    let postData = ''
    req.on('data', chunk => {
      postData += chunk.toString()
    })
    req.on('end', () => {
      resData.postData = postData
      res.end(
        JSON.stringify(resData)
      )
    })
  }
});

server.listen(port, hostname, () => {
  console.log(`Server running at http://${hostname}:${port}/`);
});
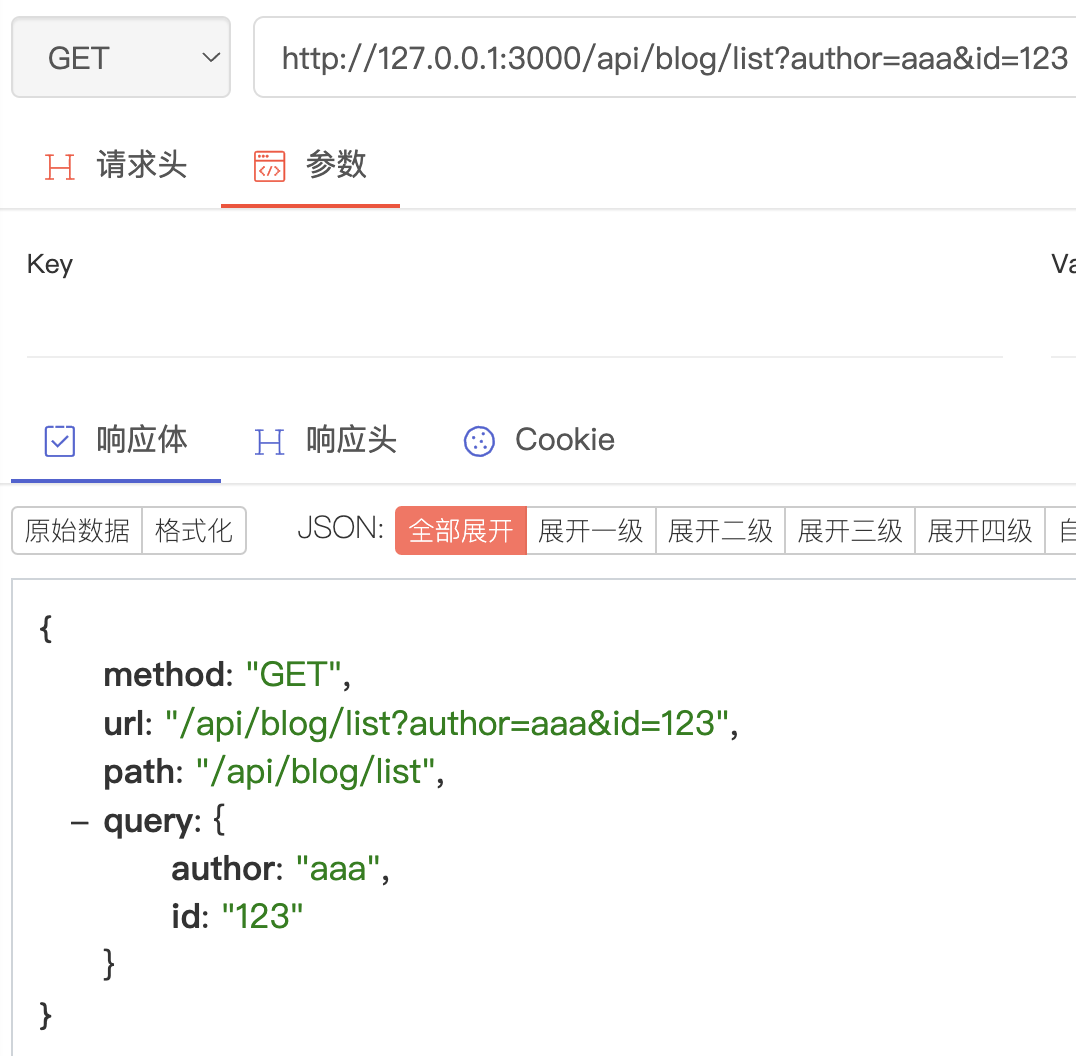
GET 调试结果:
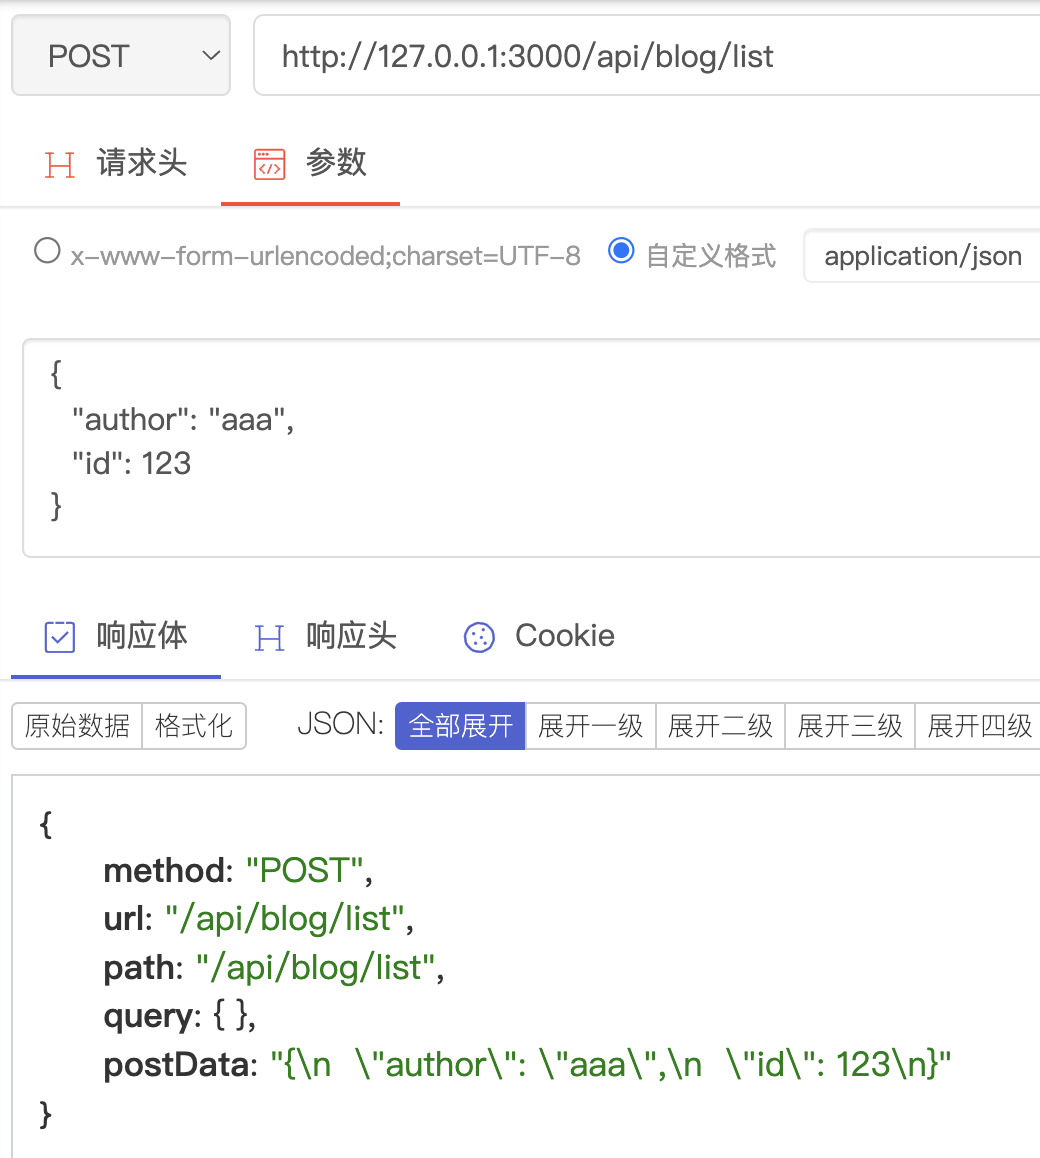
POST 调试结果:
3、Node.js 项目构建
以下是原生 Node.js 的接口开发示例,点击查看 Express 项目示例
3-1、项目初始化
- 初始化
package.json; - 安装 nodemon 监测文件变化,自动重启 node;
- 安装 cross-env 跨平台运行脚本,设置环境变量,兼容 mac、linux 和 windows;
- 添加入口文件
bin/www.js,在这里配置 Server; - 将业务代码分离至
app.js,在入口文件引入。
- package.json
- bin/www.js
- app.js
{
  "name": "node-web-server-blog",
  "version": "1.0.0",
  "description": "",
  "main": "bin/www.js",
  "scripts": {
    "test": "echo \"Error: no test specified\" && exit 1",
    "dev": "cross-env NODE_ENV=dev nodemon ./bin/www.js",
    "prd": "cross-env NODE_ENV=production nodemon ./bin/www.js"
  },
  "keywords": [],
  "author": "",
  "license": "ISC",
  "devDependencies": {
    "cross-env": "^7.0.3",
    "nodemon": "^2.0.20"
  }
}
const http = require('node:http');

const hostname = '127.0.0.1';
const port = 7676;
const serverHandle = require('../app')

const server = http.createServer(serverHandle)
server.listen(port, hostname, () => {
  console.log(`Server running at http://${hostname}:${port}/`);
})
const serverHandle = (req, res) => {
  // 设置返回格式 JSON
  res.setHeader('Content-type', 'application/json')

  const resData = {
    name: 'leophen',
    env: process.env.NODE_ENV
  }

  res.end(
    JSON.stringify(resData)
  )
}

module.exports = serverHandle
运行 yarn dev 或 yarn prd,即可启动开发环境或生产环境的服务。
3-2、路由接口开发
以一个博客项目为例,在 app.js 中引入以下接口:
博客接口:
- 获取博客列表(GET)
- 获取博客详情(GET)
- 新建一篇博客(POST)
- 更新一篇博客(POST)
- 删除一篇博客(POST)
用户接口:
- 用户登录(POST)
- app.js
- src/router/blog.js
- src/router/user.js
const handleBlogRouter = require('./src/router/blog')
const handleUserRouter = require('./src/router/user')

const serverHandle = (req, res) => {
  // 设置返回格式 JSON
  res.setHeader('Content-type', 'application/json')

  // 统一处理 path
  const url = req.url
  req.path = url.split('?')[0]

  // 处理 blog 路由
  const blogData = handleBlogRouter(req, res)
  if (blogData) {
    res.end(
      JSON.stringify(blogData)
    )
    return
  }

  // 处理 user 路由
  const userData = handleUserRouter(req, res)
  if (userData) {
    res.end(
      JSON.stringify(userData)
    )
    return
  }

  // 未命中路由,返回 404
  res.writeHead(404, { "Content-type": "text/plain" })
  res.write("404 not Found\n")
  res.end()
}

module.exports = serverHandle
const handleBlogRouter = (req, res) => {
  const method = req.method

  // 获取博客列表
  if (method === 'GET' && req.path === '/api/blog/list') {
    return {
      msg: '获取博客列表的接口'
    }
  }

  // 获取博客详情
  if (method === 'GET' && req.path === '/api/blog/detail') {
    return {
      msg: '获取博客详情的接口'
    }
  }

  // 新建一篇博客
  if (method === 'POST' && req.path === '/api/blog/new') {
    return {
      msg: '新建博客的接口'
    }
  }

  // 更新一篇博客
  if (method === 'POST' && req.path === '/api/blog/update') {
    return {
      msg: '更新博客的接口'
    }
  }

  // 删除一篇博客
  if (method === 'POST' && req.path === '/api/blog/del') {
    return {
      msg: '删除博客的接口'
    }
  }
}

module.exports = handleBlogRouter
const handleUserRouter = (req, res) => {
  const method = req.method

  // 用户登录
  if (method === 'POST' && req.path === '/api/user/login') {
    return {
      msg: '用户登陆的接口'
    }
  }
}

module.exports = handleUserRouter
3-3、数据模型建立/数据处理分离
- 在
src/model下建立统一的接口返回模型; - 将
router路由与其中的数据处理分离;
- 模型建立
- 模型使用
- 分离数据处理
新建统一的返回模型:
class BaseModel {
  constructor(data, message) {
    if (typeof data === 'string') {
      this.message = data
      data = null
      message = null
    }
    if (data) {
      this.data = data
    }
    if (message) {
      this.message = message
    }
  }
}

class SuccessModel extends BaseModel {
  constructor(data, message) {
    super(data, message)
    this.status = 0
  }
}

class ErrorModel extends BaseModel {
  constructor(data, message) {
    super(data, message)
    this.status = -1
  }
}

module.exports = {
  SuccessModel,
  ErrorModel
}
这里引入前面建立的数据模型,对接口返回的成功/失败数据进行统一返回:
const querystring = require('node:querystring')
const { getList } = require('../controller/blog')
const { SuccessModel, ErrorModel } = require('../model/resModel')

const handleBlogRouter = (req, res) => {
  const method = req.method

  // 获取博客列表
  if (method === 'GET' && req.path === '/api/blog/list') {
    const query = querystring.parse(url.split('?')[1])  // 拿到 query
    const author = query.author || '' // 声明 author,供处理器调用
    const type = query.type || '' // 声明 type,供处理器调用
    const listData = getList(author, type)  // 调用分离的博客列表处理方法

    return new SuccessModel(listData) // 返回前面建立的模型
  }

  // 其它接口
  // ...
}

module.exports = handleBlogRouter
这里将前面获取博客列表中数据处理部分分离到 controller 中:
const getList = (author, type) => {
  // 暂时返回正确格式的假数据
  return [
    {
      id: 1,
      title: "标题 A",
      content: "内容 A",
      createtime: 1669359152188,
      author: "作者 A",
      tag: "标签 A"
    },
    {
      id: 2,
      title: "标题 B",
      content: "内容 B",
      createtime: 1669359211200,
      author: "作者 B",
      tag: "标签 B"
    }
  ],
}

module.exports = {
  getList
}
3-4、连接配置 MySQL 数据库
yarn add mysql2 -D
- 数据库配置
- 封装统一执行 SQL 的函数
const env = process.env.NODE_ENV  // 环境参数

// 配置
let MYSQL_CONFIG

if (env === 'dev') {
  MYSQL_CONFIG = {
    host: 'localhost',
    user: 'root',
    password: 'xxx',
    port: 3306,
    database: 'myblog'
  }
}

if (env === 'production') {
  // 这里应为线上配置,暂时用本地替代
  MYSQL_CONFIG = {
    // 同上
  }
}

module.exports = {
  MYSQL_CONFIG
}
const mysql = require('mysql2')
const { MYSQL_CONFIG } = require('../config/db')

// 创建连接对象
const connection = mysql.createConnection(MYSQL_CONFIG)

// 开始连接
connection.connect()

// 统一执行 SQL 的函数
function exec(sql) {
  const promise = new Promise((resolve, reject) => {
    connection.query(sql, (err, res) => {
      if (err) {
        reject(err)
        return
      }
      resolve(res)
    })
  })

  return promise
}

module.exports = {
  exec
}
3-5、接口对接 MySQL 数据库
- 接口数据处理函数改造
- 接口异步改造
- 路由异步处理
// 获取博客列表接口的数据处理函数
const { exec } = require('../db/mysql')

// 根据 author 和 type 查询博客列表
const getList = (author, type) => {
  let sql = `select * from blogs where 1=1 `
  if (author) {
    sql += `and author = '${author}'`
  }
  if (type) {
    sql += `and type = '${type}'`
  }
  sql += `order by createtime desc`

  // 返回 promise
  return exec(sql)
}
由于引入的 getList 数据处理函数返回的是 promise,因此需要对拿到的返回值进行 .then 处理:
const querystring = require('node:querystring')
const { getList } = require('../controller/blog')
const { SuccessModel, ErrorModel } = require('../model/resModel')

const handleBlogRouter = (req, res) => {
  const method = req.method

  // 获取博客列表
  if (method === 'GET' && req.path === '/api/blog/list') {
    const author = req.query.author || '' // 声明 author,供处理器调用
    const type = req.query.type || '' // 声明 type,供处理器调用

    const listData = getList(author, type)  // 调用分离的博客列表处理方法
    return new SuccessModel(listData) // 返回前面建立的模型

    const result = getList(author, type)
    return result.then(listData => {
      return new SuccessModel(listData)
    })
  }

  // 其它接口
  // ...
}

module.exports = handleBlogRouter
同理,也要对路由进行异步处理:
const handleBlogRouter = require('./src/router/blog')
const handleUserRouter = require('./src/router/user')

const serverHandle = (req, res) => {
  // 设置返回格式 JSON
  res.setHeader('Content-type', 'application/json')

  // 统一处理 path
  const url = req.url
  req.path = url.split('?')[0]

  // 处理 blog 路由
  const blogData = handleBlogRouter(req, res)
  if (blogData) {
    res.end(
      JSON.stringify(blogData)
    )
    return
  }
  const blogResult = handleBlogRouter(req, res)
  if (blogResult) {
    blogResult.then(blogData => {
      res.end(
        JSON.stringify(blogData)
      )
    })
    return
  }

  // 处理 user 路由
  const userData = handleUserRouter(req, res)
  if (userData) {
    res.end(
      JSON.stringify(userData)
    )
    return
  }

  // 未命中路由,返回 404
  res.writeHead(404, { "Content-type": "text/plain" })
  res.write("404 not Found\n")
  res.end()
}

module.exports = serverHandle
运行:
yarn dev
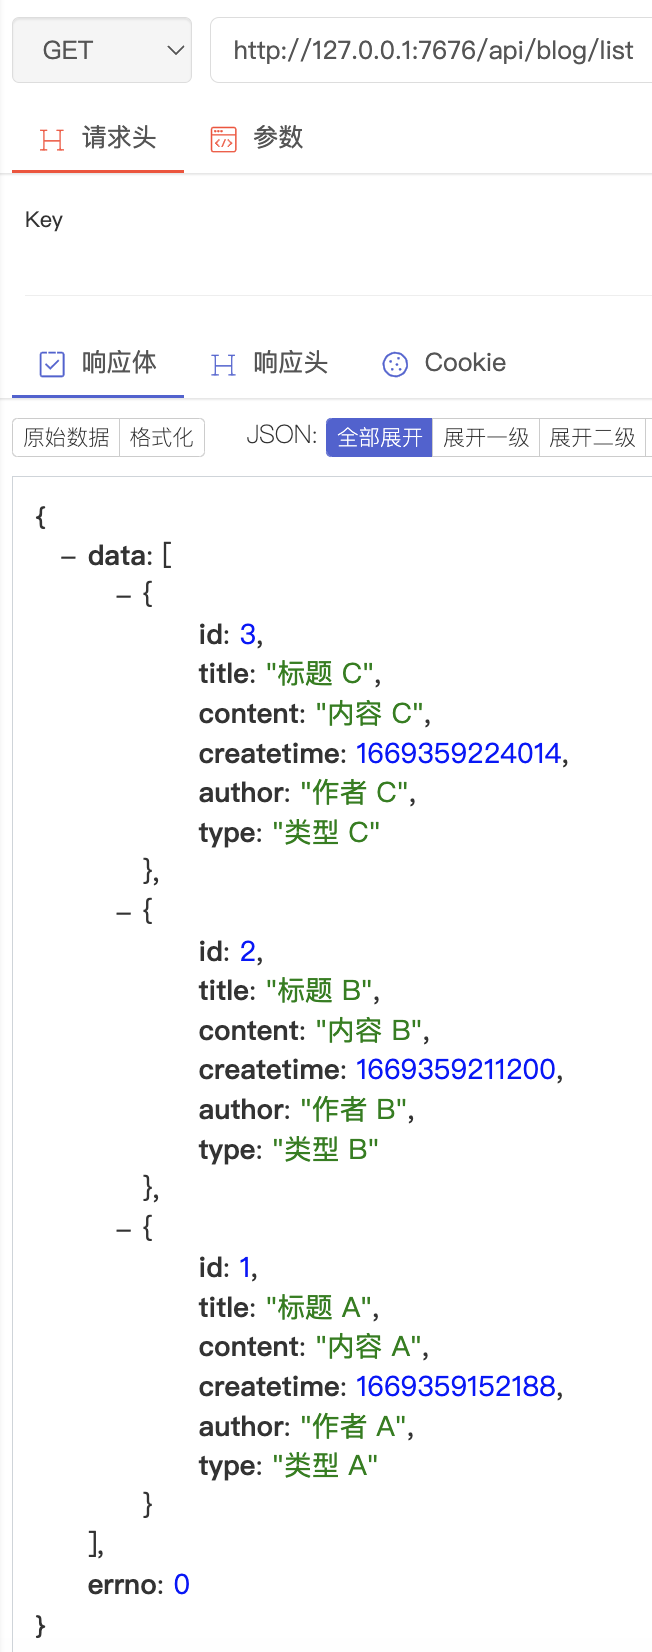
访问 http://127.0.0.1:7676/api/blog/list,结果如下:
五、Node.js 调试
v8 Inspector Protocol 是 nodejs v6.3 新加入的调试协议,通过 websocket与 Client/IDE 交互,同时基于 Chrome/Chromium 浏览器的 devtools 提供了图形化的调试界面。Node.js 可通过 Inspector Protocol 配合 Chrome 开发者工具进行调试,具体步骤如下:
{
  "scripts": {
    "dev": "cross-env NODE_ENV=dev ./node_modules/.bin/nodemon bin/www",
    "dev": "cross-env NODE_ENV=dev ./node_modules/.bin/nodemon --inspect=9222 bin/www",
  },
}
运行项目后,直接访问监听的端口页,打开 Chrome 开发者工具,可看到调试按钮,点开即可进入调试页:

可访问 chrome://inspect/#devices 查看当前浏览器监听的所有 inspect:
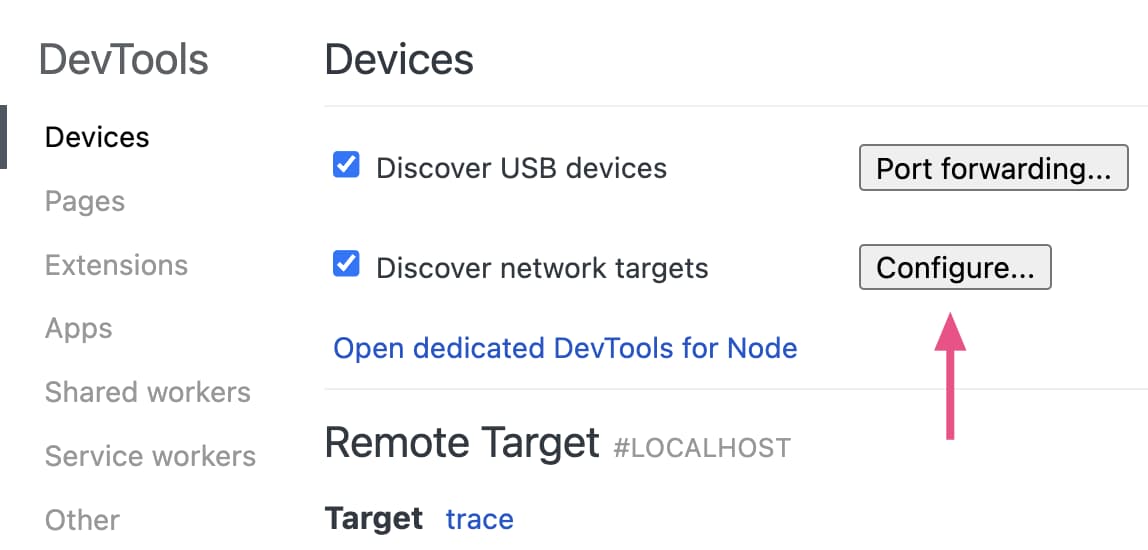
点开 Configure 可修改或新增监听端口。